Remote SSH login for IoT devices on free Ubuntu servers is a powerful technique that enables users to manage and interact with their IoT systems from anywhere in the world. As the Internet of Things (IoT) continues to grow, understanding how to securely connect to these devices via SSH becomes crucial for both hobbyists and professionals. This article will guide you through the process, providing step-by-step instructions and expert tips to ensure your IoT setup is both functional and secure.
In today’s interconnected world, IoT devices have become an integral part of daily life, from smart homes to industrial automation. However, managing these devices remotely can be challenging, especially when you need to access them securely without compromising performance. By leveraging SSH (Secure Shell), you can achieve seamless and encrypted communication with your IoT devices.
This comprehensive guide will cover everything you need to know about setting up remote SSH login for IoT devices on a free Ubuntu server. We’ll explore the basics of SSH, its importance in IoT, and how to configure your environment to ensure a smooth and secure connection. Whether you’re a beginner or an experienced developer, this article will provide valuable insights to enhance your IoT projects.
- Does Https Bollyflix Work A Comprehensive Guide
- Wwwmovierulzcom In Telugu Your Ultimate Guide To Telugu Movies
Understanding SSH and Its Role in IoT
SSH, or Secure Shell, is a cryptographic network protocol designed to enable secure communication between devices over an unsecured network. In the context of IoT, SSH plays a critical role in allowing users to remotely access and manage their devices without exposing sensitive data to potential threats.
What is SSH?
SSH is a protocol that provides secure communication by encrypting data transmitted between devices. It ensures that commands and information exchanged between your local machine and remote IoT devices remain private and tamper-proof. This is particularly important when dealing with IoT devices, as they often contain sensitive data or control critical systems.
- SSH encrypts all data, including passwords, to prevent unauthorized access.
- It supports authentication mechanisms such as public key cryptography for enhanced security.
- SSH is widely supported across various operating systems, including Ubuntu, making it a versatile tool for IoT applications.
Why Use SSH for IoT Devices?
Using SSH for IoT devices offers several advantages, including:
- Hayley Atwell A Rising Star In The World Of Entertainment
- Hsoda 052 Exploring The Revolutionary Solution For Modern Challenges
- Security: SSH ensures that all communication between your local machine and IoT devices is encrypted, reducing the risk of data breaches.
- Remote Access: With SSH, you can manage your IoT devices from anywhere in the world, as long as you have an internet connection.
- Automation: SSH enables you to automate tasks, such as updating software or running scripts, on your IoT devices without needing physical access.
Setting Up a Free Ubuntu Server for IoT
Before you can configure SSH for your IoT devices, you need to set up a free Ubuntu server. This section will walk you through the process of installing and configuring Ubuntu for IoT applications.
Choosing the Right Ubuntu Version
When selecting an Ubuntu version for your IoT server, consider the following factors:
- Ubuntu Core: Designed specifically for IoT devices, Ubuntu Core offers a lightweight and secure environment tailored for embedded systems.
- Ubuntu Server: A more general-purpose option, Ubuntu Server provides a robust platform for hosting SSH services and managing IoT devices.
For this guide, we’ll focus on using Ubuntu Server, as it provides greater flexibility and compatibility with a wide range of IoT devices.
Installing Ubuntu on a Virtual Machine
If you don’t have access to physical hardware, you can set up a free Ubuntu server using a virtual machine. Follow these steps:
- Download the latest Ubuntu Server ISO from the official website.
- Install a virtualization platform such as VirtualBox or VMware.
- Create a new virtual machine and select the downloaded Ubuntu ISO as the installation media.
- Follow the on-screen instructions to complete the installation process.
Configuring SSH on Your Ubuntu Server
Once your Ubuntu server is up and running, the next step is to configure SSH for remote access. This involves installing the SSH server, setting up user accounts, and configuring firewall rules to ensure secure communication.
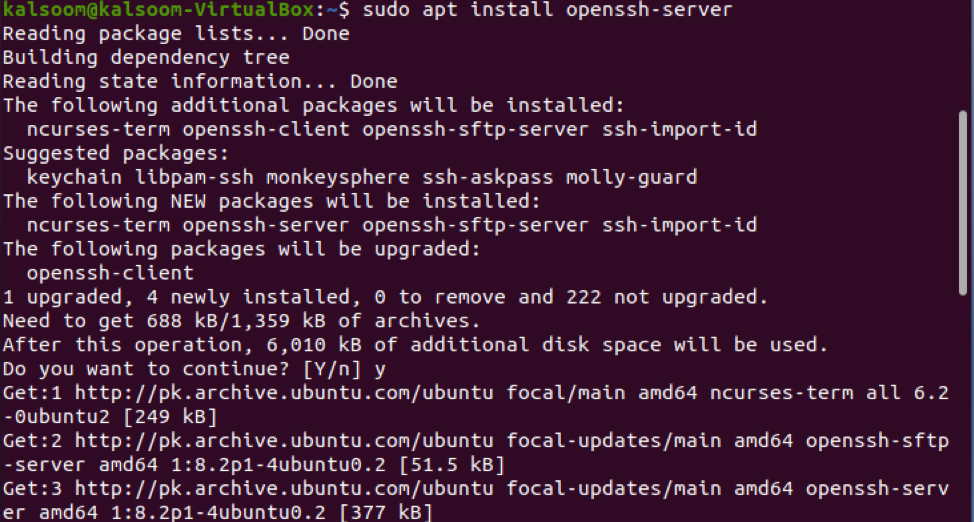
Installing the SSH Server
To install the SSH server on your Ubuntu machine, open a terminal and run the following command:
sudo apt update && sudo apt install openssh-server
This command updates your package list and installs the OpenSSH server, which is the most widely used SSH implementation.
Setting Up User Accounts
For security reasons, it’s recommended to create a dedicated user account for accessing your IoT devices via SSH. Follow these steps:
- Open a terminal and run the following command to create a new user:
sudo adduser iotuser- Set a strong password for the new user and configure additional settings as needed.
Configuring Firewall Rules
To ensure secure communication, configure your firewall to allow SSH traffic on port 22. Use the following command:
sudo ufw allow ssh
This command enables SSH access while blocking unauthorized traffic, enhancing the security of your IoT setup.
Connecting to IoT Devices via SSH
With your Ubuntu server configured, you can now connect to your IoT devices using SSH. This section will guide you through the process of establishing a secure connection.
Using SSH from the Command Line
To connect to your IoT device from the command line, use the following syntax:
ssh username@device_ip_address
Replace username with the name of the user account you created earlier and device_ip_address with the IP address of your IoT device.
Using SSH Clients
If you prefer a graphical interface, you can use SSH clients such as PuTTY (for Windows) or Terminal (for macOS). These tools provide an intuitive way to manage your SSH connections and interact with your IoT devices.
Enhancing Security for Remote SSH Connections
While SSH provides a secure method for remote access, it’s essential to implement additional security measures to protect your IoT devices from potential threats.
Disabling Password Authentication
Password-based authentication can be vulnerable to brute-force attacks. To enhance security, disable password authentication and use public key cryptography instead. Follow these steps:
- Generate an SSH key pair on your local machine using the following command:
ssh-keygen -t rsa -b 4096- Copy the public key to your IoT device using the
ssh-copy-idcommand. - Edit the SSH configuration file (
/etc/ssh/sshd_config) to disable password authentication.
Changing the Default SSH Port
Changing the default SSH port (22) can help reduce the risk of automated attacks. To do this, edit the SSH configuration file and set a new port number. Remember to update your firewall rules accordingly.
Managing IoT Devices with SSH
Once you’ve established a secure SSH connection, you can begin managing your IoT devices. This section will cover some common tasks you can perform using SSH.
Updating Software
Keeping your IoT devices up to date is crucial for maintaining security and performance. Use the following commands to update your system:
sudo apt update && sudo apt upgrade
Running Scripts
SSH allows you to run scripts on your IoT devices remotely. Simply navigate to the script’s directory and execute it using the ./ command.
Troubleshooting Common SSH Issues
Despite its reliability, SSH can sometimes encounter issues. This section will address some common problems and provide solutions to help you resolve them.
Connection Refused
If you receive a "connection refused" error, ensure that:
- The SSH server is installed and running.
- Firewall rules allow SSH traffic on the specified port.
- The IP address and port number are correct.
Permission Denied
If you encounter a "permission denied" error, verify that:
- Your user account has the necessary permissions to access the IoT device.
- Public key authentication is properly configured.
Best Practices for Remote SSH Login
Adopting best practices for SSH can significantly improve the security and reliability of your IoT setup. Consider the following tips:
- Regularly update your SSH server and client software.
- Monitor logs for suspicious activity.
- Limit SSH access to trusted IP addresses when possible.
Conclusion
Remote SSH login for IoT devices on free Ubuntu servers is a powerful tool that enables secure and efficient management of your IoT systems. By following the steps outlined in this article, you can set up a robust SSH environment tailored to your specific needs. Remember to prioritize security and adhere to best practices to protect your devices from potential threats.
We encourage you to share your thoughts and experiences in the comments section below. Additionally, feel free to explore other articles on our site for more tips and insights into IoT development. Together, let’s build a safer and more connected world!